Happy Friday! One of my most downloaded Photoshop/PSE actions is the Underwater Luxe. I love that action but after using it for some time I wanted to write an updated version that I believe is better. Today you can download this update called Underwater Luxe 2. Yes, a very original name. Hee hee!
This action reduces haze, adds beautiful dark contrast, and allows you to remove blue casts off and smooth skin in underwater images. But it isn't only for portraits!
I have a step-by-step tutorial posted below (I overdid the effect somewhat so it was easier to see a difference on a small screen). Download the free action near the bottom of this post.
CoffeeShop "Underwater Luxe 2" Tutorial:
Run "Underwater Luxe 2". A Color Range pop-up will appear, this step is for skin smoothing and is optional. If you are using this on a portrait, simply click on the skin area that you wish to smooth to select it and adjust the Fuzziness to taste. Just leave "as-is" if you don't need skin smoothing.
Adjust the Radius and Threshold setting until you are satisfied with the skin smoothing (or do nothing if you don't need this layer). You will be able to dial it down after the action finishes so if anything, overdo it a little.
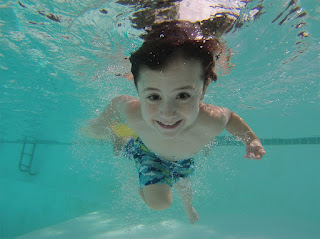
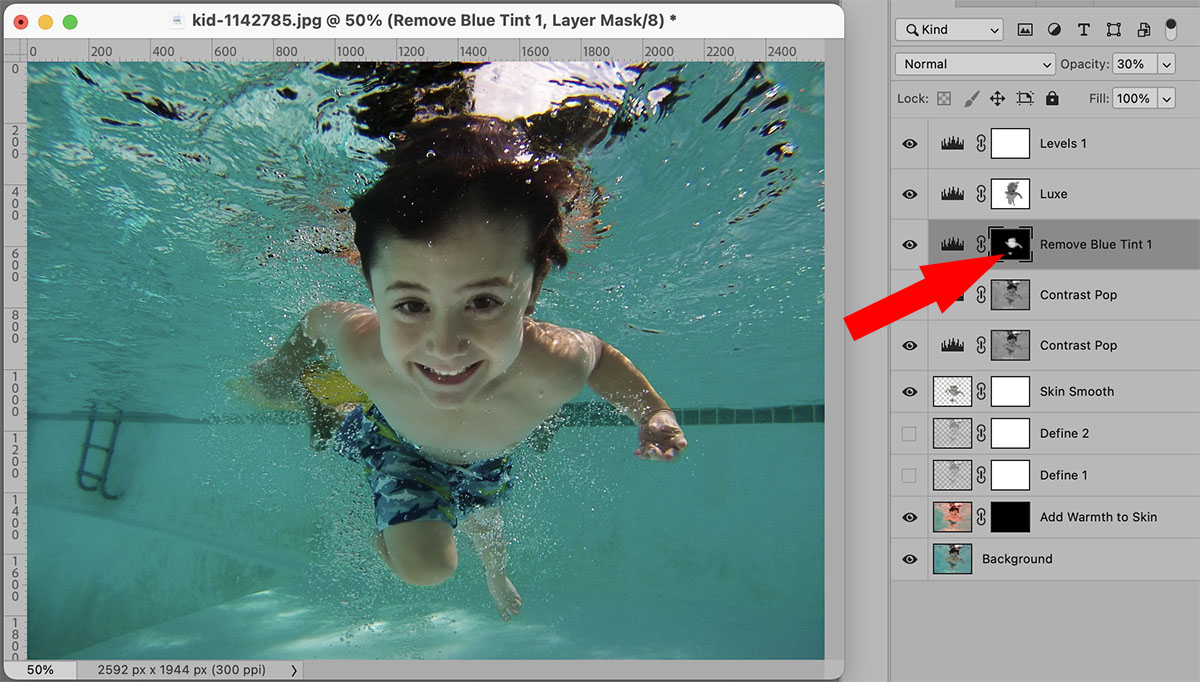
This is what the image looks like after "Underwater Luxe 2" has finished. Lovely, right?
Click to select the Luxe's layer mask and use your favorite selection method to select the person (or animal/fish) where you want to remove some of the dark contrast. Then go to Edit<Fill and fill the layer mask with 50% gray. Or just start painting over the image with a low opacity black brush.
If you want to remove more Luxe off the skin, use a soft black brush at low opacity where needed.
Click to select the Remove Blue Tint 1 layer's mask and use a soft white brush to remove any blue tint off of skin/eyes/teeth.
Keep both Contrast Pop layers on and adjust each opacity to taste. Turn off the Skin Smooth layer if you don't need it or adjust its opacity. Adjust the Define 1 and Define 2's opacity to taste. Then click on the Add Warmth to Skin's layer mask and use a low opacity white brush to gently add back some additional warmth to skin if needed.
As a final step, open up the top Levels 1 layer and adjust the sliders to taste. Now it is finished and I think it looks great! Note: I did overdo the edit slightly so that you can see the changes on a small screen.
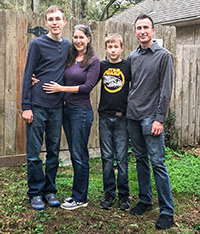
Here is one more, you don't just use this action on people!
Download the CoffeeShop "Underwater Luxe 2" Fine Art Photoshop/PSE Action!
Do you want to download thousands of professional CoffeeShop PSE/Photoshop actions (including exclusive ones not found anywhere for free), textures/overlays, scrapbooking papers, clip art/design elements, photo storyboards and frames, and Lightroom presets from this site in one convenient zipped file AND help support this one-woman blog?
Just click here for my CoffeeShop Mega Download Pack!


 =
=